Thursday, September 26, 2013

Happy Mail!

My better half has completely indulged my desire for washi tape. He bought me a huge order of rolls from Cute Tape one day, and I relish getting to use them. I spotted Case This Sketch #47 and decided it needed washi tape, but I wasn't sure how. It seemed too obvious just to run tape lines across the card, so I decided to tear them up a bit.


I kind of like it. I don't know if I should have made it messier or cleaner. Also, I need to start using blending card, because regular ol' card just isn't cutting it. There's some bad use of alcohol marker here -- just be glad you can't see it so much in the picture!

Supplies: Washi Tape; Lawn Fawn 'Quinn's ABCs'; Stampendous 'Typewriter Wishes'; Doodlebug Pearls; Spectrum Noir TB1-TB3; Tsukineko Memento Tuxedo Black.


Saturday, September 21, 2013

Sew Happy For Your Birthday!

I happened upon Cosmo Cricket's 'Material Girl' in the clearance at Archiver's and snatched that kit right up. My mother, my grandmother, and a goodly number of people I know are quilters and sewers. First up, Grandma. For whatever reason, her birthday was not on my calendar, so thankfully I mentioned my score to mom who got me right on it!


The layout is from Seize the Sketch #4. This is a card where I actually did an inside! I didn't take a pic, but it's a sewing machine stamp and the words 'For Your Birthday'. I think she's going to like it.

Supplies: cream card; yellow paper and sticker from Material Girl; red button paper from DCWV 'Crafty Stack'; red ribbon and Geranium marker from American Crafts; Stampendous 'Typewriter Wishes'; My Mind's Eye Stella and Rose Mabel 'So Sweet' stamps; buttons, Tsukineko VersaMagic 'Pink Grapefruit' inside.

Friday, September 20, 2013

Creepy. Crawly. Spooky. Skull!

Just a quick one today for CTS 46. As usual, I'm super-literal. But I loved the simple sketch. I'm seeing Halloween stuff on the shelves and on the blogs, so it's rubbed off on me quite a bit earlier than usual this year!


I used Spellbinders Labels 3 to cut the hole out of the card, then I stamped the skull on orange distressed paper and embossed. I used a few dimensional squares to pop the orange off the inside of the card, then added the sentiment and the brad. Using a needle punch tool is a quick way to pierce through both tag and card, marking the spot for the brad.

Supplies: black and orange card; My Mind's Eye Lost and Found Halloween Stamps; Tsukineko VersaMagic Midnight Black; Teresa Collins Fabrications brad; Mr. Huey's Dark Calico; clear embossing powder; dimensional adhesive.

Hoppy Halloween from the Vampire Bunny!

I knew my other half would get a kick out of 'Bunnicula' here. He's also rather fond of my first-ever attempt at an inked background. I've seen plenty of inked night skies, but never built my own. It's a little harder to do, I think, with my chalk inks rather than the Distress inks, but I worked with what I had!


Mr. Vampire was masked out over watercolor paper and the blues and greens were inked. He and his shadow were done with colored pencils. The moon and stars stamps are just outlines. I stamped the outlines in VersaMark, then filled them in (quickly!) with an embossing pen. Then I used white embossing powder over it all.

I like him! I never seem to do square cards, but I felt he needed something solid to sit on, and an A2 was just not cutting it. Hope you enjoy!

Supplies: Black cardstock; ivory vellum; Authentique 'Enchanted' 6x6 papers; Lawn Fawn 'Hoppy Halloween' stamps; Lawn Fawn and American Crafts twine; Basic Grey brad; Doodlebug Designs pearls; white embossing powder; Tsukineko inks -- almost every blue and green VersaMagic Dewdrop plus VersaMark and StazOn black.

Tuesday, September 17, 2013

Best Wishes in Navy and Champagne

I was scrolling through all the blogs I subscribe to when I stopped, dropped, and made a card. I just had to when I saw Runway Inspired Challenge #44! I've always wanted to play along with them, but haven't for whatever reason. I saw the champagne and navy blue dress and thought: this needs my navy blue spray mist! Bam! Have a card...


This card was fast to make, but kind of messy. To get the big ink blobs from a spray, don't spray! Take the lid off the bottle, and whack the lid against the bottle so big drops come off the sprayer straw. When I had a few big wet drops, I shook and tapped the card around so they would smear and run. Then I hit it with a regular misting.

There's two layers of vellum on there as one layer was too see-through for my tastes. The stamp took six, yes six runs to get a clean impression. My ink was too wet, me thinks, and the sides swirls (which I ended up cutting off) would not impress or would ghost. I think it turned out pretty well though! I was hoping for 'an elegant mess' and I think I got there (and in record speed to boot!).

~Happy Crafting!~

Supplies: Bazzill Basics Walnut Cream; vellum; American Crafts navy ribbon, cream sateen ribbon; Paper Studio Gemstones 'Jeweltones Mosaic'; Inkadinkadoo 'Vintage Expressions'; Tsukineko Brilliance 'Mediterranean Blue'.

Saturday, September 14, 2013

Oh Deer! Get Well Soon...

I finally have in my possession the stamp set I've been dying for since its announcement date! It's Lawn Fawn's "Into the Woods", and it's mine, and you can't have it. (I also got the Yeti set, a vampire bunny, and a few other things in my order... but enough about my poor shopping habits!)

My significant other's mother just had an overnighter in the ER. Not cool. She'll be fine (she always is), but since she loves my cards, I'll take that as a reason to rip open the package and start stamping. Enter the most adorable deer to ever be stamped on paper!


This is one of the Shadow Box Cards. I highly recommend the collection. Particularly because they fold flat for mailing, which is about the awesomest thing ever. I've used them before... just not on this blog! ;) :P I'll leave you to figure that out.

I wanted a bit of a 'rainy day' feeling, so I tried for a muted blue-gray color scheme. The paper of the back panel (Amy Tangerine Sketchbook 'Indigo Inspiration') really does the work. I also thought pale woodgrain would be neutral and not overwhelming; it's a technique I saw on this card and really wanted to duplicate.

I got the inspiration to 'bookplate' the title at the last minute. I contemplated die cutting an inverse corner tag for it, but I thought that might be overkill. (Plus, I had already stamped the sentiment three times, so I quit.) I still think it kind of looks like a label you might see on a wall plaque or diorama anyway.

The tree is my favorite trick of the whole thing. I stamped one tree from Lawn Fawn 'Critters in the Forest', colored, and then cut it in half down the center. You can see how it's popped off the back panel with the cut edge hidden in the side pic. Saved coloring and cutting another tree! I adhered them at different heights so they would look like they weren't two halves of the same tree. But they are... and now that you know my secret, I'm going to have to kill you.

Just kidding.

~Happy crafting!~

ETA: My card was included on this Lawn Fawn Fawny Flickr Monday post! I am so honored!

Supplies: abovementioned plus: pale blue, sky blue, white cardstocks; Lawn Fawn 'On the Mend'; Hero Arts 'Designer Woodgrain'; Tsukineko Memento Black and VersaMagic Niagara Mist; Spectrum Noir DG2, 3, and 4; Copic Blender; Paper Studio 'Crackle Round' gray gems; Fiskars corner rounder; 3D adhesive and a metric crapton of liquid glue at the seams.

Thursday, September 12, 2013

Make a Wish Pin-Up Birthday Card

Well, it's that time again. I need a birthday card for my 1950s-loving friend. She was over the other day using my die cutter to cut twirled flowers from her old pin-up calendar pages. She gave me a page to use for my own purposes. I knew what to do!

Here's her card. I used the sketch from Just Us Girls Challenge 205. I made the oval frame in my cutter software by welding some wingding twirls with an oval and adding an inline layer. I tried distressing the edges, but I used metallic inks and I'm not sure how well I liked it. The Tsukineko Brilliance 'Lightning Black' shows up really super gold on the black. It's interesting, but not exactly what I was hoping for.

Supplies: calendar page; red, black, and cream cardstock; die cutter (Pazzles); red ribbon (American Crafts); sticker (3 Bugs in a Rug 'Celebrate'); black rhinestones; inks (Tsukineko Brilliance).

Wednesday, September 11, 2013

Wow, You're One!

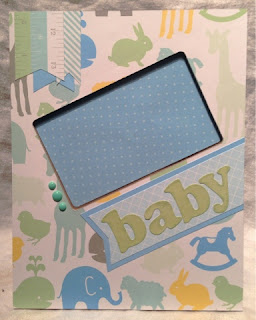
I have a little friend who is turning one tomorrow. I wanted to wrap his present in a way he would actually open. So this is a white lunch bag with a custom topper. He can rip it to shreds pretty easily. There's no tape or anything.

It's pretty easy to make a lunch bag topper. I made a large rectangle in my cutter software, rounded the corners by 2", and added a scissor border. After cutting, I folded it in half and glued it on top of the closed bag. Then I added all the embellishments.

Supplies: Die Cutter (Pazzles Inspiration); Paper (Bazzill Basics green; Martha Stewart 'Baby Boy'); Stamps (TPC Studio 'Baby'); Inks (Tsukineko VersaMagic); Pearls (Recollections); Twine (American Crafts); Colored pencils; Copic Multiliner; sticker.

Tuesday, September 10, 2013

More craftiness from yesterday

After making one challenge entry yesterday, I kind of kept going. And going. And going...


This card is intended for a friend's birthday. As she and I both love books (she's a librarian, so she kinda trumps me on the book love). It's also my entry to Lawnscaping's 'Favorite Things' challenge. What are my favorite things? Paper, books, stamps (Lawn Fawn!), and sweet embellishments. (The little orange rose for example, from Webster's Pages). Most everything on this card is Lawn Fawn Dewey Decimal. I 'stole' it from Scrapbooking Steals (seen a shopping trend?) and was thinking I'd end up making cards for this particular librarian friend...

Picture frame for the coworker of the significant other. She said 'animals', and so she receives.

I also did some serious craft area organization. It was a lot of work, but totally worth it!

Sunday, September 8, 2013

Best Wishes and a triple-scoop of challenges

Since I have all this time on my hands (having been laid off, did I mention that?) I'm continuing with my personal challenge to use and do things that I don't normally do. Add two more challenges: I'm playing with Mojo Monday 309 (sketch) and Stamping Royalty 192 (patterned paper). I decided I'm going to use a coordinating patterns (does washi tape count?) and go as whole-hog as I can into freestyle collage. My friend Michelle is really good at this, particularly with combining patterns and adding dots in random places, which sets off my OCD sensor most of the time.

Bonus: these papers were a freebie from an Archivers deal I got forever ago. Shop the stash, y'all! The 'washi tape' on the bottom left is actually part of the paper. Even more fun: using coordinating colors I had no idea where or how they'd be used! (Looking at you Lawn Fawn Retro twine!)


ETA: Not-iPhone photo!


Supplies: Studio Calico 'Take Note' and Mr. Huey's 'Cameo; Bazzill Basics 'Vanilla Cream'; Anna Griffen 'Modern Graphic' stamps; Tsukineko VersaMagic 'Pink Grapefruit'; Ranger Distress Ink 'Antique Linen'; patterned Washi tape; 3D adhesive; My Mind's Eye 'Sky's the Limit' enamel dots; Hemptique and Lawn Fawn twine.

Sunday, September 1, 2013

Love Is the Gift of Oneself

Rarely do I make a card from only one kit. I usually combine pieces from across lines. So I tried to do this from all in one. Bonus, it gets me to use the stickers with the kit, which again I rarely use—I'm after the papers and the stickers are just a bonus! This was all Teresa Collins Fabrications Linen. The sketch is from My Favorite Things, #139.